Following a guide to self-publishing for homeschool students can level up their schooling experience, not to mention their futures. Over 80% of people want to write a book, but successfully doing so is another story, literally! This guide to self-publishing for homeschoolers walks you through the entirety of the self-publishing process.
If you are a homeschool teacher, use this guide to lead your student to becoming an author. If you are a student, follow this step-by-step format to help you complete your book. Read until the end for a free resource to help you jump-start your publishing journey as well!
Guide to self-publishing for homeschoolers: what’s covered
- Should a first time author self-publish?
- How hard is it to self-publish a book?
- What is the average cost to self-publish?


Book Outline Generator
Choose your Fiction or Nonfiction book type below to get your free chapter by chapter outline!
Book Outline Generator
Enter your details below and get your pre-formatted outline in your inbox and start writing today!
CONGRATULATIONS
Thanks for submitting! Check your email for your book outline template.
In the meantime, check out our Book Outline Challenge.

Should a first time author self-publish?
Self-publishing as a first time author teaches you the publishing process in one of the most hands-on ways possible. Learning the process in this manner can help you succeed, not only with your debut manuscript, but others as well.
Plus, while following this guide to self-publishing for homeschool students can manifest in the publication of your first book, self-publishing also teaches you how to make money publishing books on Amazon as well.
All that to say, even if you are a first time author, learning how to publish your own book, rather than leaving this process to a publisher, will teach you vital skills. Ready to dive into this guide to self-publishing for homeschoolers?
How hard is it to self-publish a book?
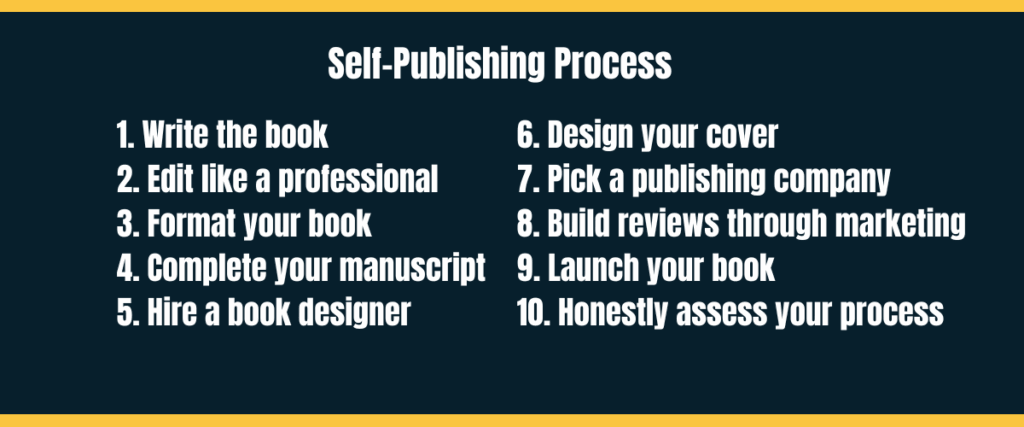
Self-publishing a book can be as streamlined or as in-depth as you choose to make it. For our purposes, and this guide to self-publishing for homeschoolers, I break the process into ten, actionable steps.
As you test the process yourself, feel free to personalize it to your and your book’s needs. It is important to remember that to get your book noticed, a professional edit, cover, and marketing plan is a must. Alright, here’s your guide to self-publishing for homeschool students!

1. Write the book
The first step in this guide to self-publishing for homeschool students necessitates actually sitting down to write. The biggest choice before writing is to determine if you want to write fiction or nonfiction. Fiction could be anything from fantasy to historical characters set hundreds of years ago. Nonfiction encompasses anything based on fact.
After you settle on a genre, niché down, outline your book, and set your writing deadline. (This will influence your launch date. More on this in step nine.) We have a large selection of posts centered on the writing process.
Here are just a few to point you in the right direction:
- Character development
- Characterization
- Character traits
- Plot structure
- Themes in storytelling
- How to write dialogue
Even if you use this guide to self-publishing for homeschool students focused on writing nonfiction, plot structure, theme, and even dialogue matters, just as it does for fiction.
2. Edit like a professional
Next, it’s time to learn how to self-edit. A great place to start is to ensure you use the show, don’t tell writing style. Robert Kiyosaki, known for his bestseller, Rich Dad, Poor Dad, is a great example of how to use this rule in nonfiction. He uses storytelling to communicate financial literacy, and as a result, his book has sold itself right off the shelves.
You may also want to hire a book editor. If you can’t afford a professional editor at this time, check out this New York Times bestselling author’s guide to self-editing practices.
3. Format your book
Particularly for self-publishing, where this guide for self-publishing for homeschool students focuses, formatting is crucial. A great place to start is to follow industry-standard formatting guidelines. Then, after your book is complete, fine-tune your formatting to fit the exact layout you desire for publication.
Follow this list to format your book for drafting and editing:
- 12 point font size
- Double-spaced
- Times New Roman font
- First line of new paragraphs indented .5”
Be sure to use the Styles Pane in Microsoft Word when formatting to avoid soft returns and other formatting issues you will have to edit out later. And for the parents/homeschool teachers out there, no double-spaces between sentences! That was intended for the age of typewriters and we are long, long past that.
4. Complete your manuscript
Once you write, edit, and format your manuscript, you reach step four of this guide to self-publishing for homeschoolers. Double-check that your chapter numbers are chronological, you caught any plot point issues, and your formatting meets your standards.
5. Hire a book designer
Of course, since this is a guide for self-publishing for homeschool students, you may not be able to hire a designer as a middle school or high schooler. However, if a bit of the homeschool budget can go toward step five, more power to you.
Working with a book designer will teach you invaluable lessons, not least of which is how to put the reader first. From font size for the book, to the width/height of pages, a designer can help you through the process.
6. Design your cover
Have fun with step six of this guide to self-publishing for homeschoolers. Play around with templates on Canva, ask friends and other writing groups what they most resonate with, then settle on your cover. Remember, oftentimes, your book’s cover is the first impression your reader has of your book. Make it stand out!
7. Pick a publishing company
There are many self-publishing companies out there, and each offers something a little bit different. For our purposes with this guide to self-publishing for homeschool students, you may want to simply go straight to Amazon KDP. Here is an in-depth guide on how to upload your book to Amazon KDP.
8. Build reviews through marketing
Once you write your book and know how to upload and publish, it’s time to start the marketing process. Many self-publishing success stories rely on great writing, but also great marketing plans. There are a plethora of ways to market your book and garner great reviews. One of these ways is to work with a book launch team.
Working with a launch team teaches valuable lessons, such as how to:
- Effectively lead a group
- Encourage a team toward a common goal
- Overcome roadblocks you encounter while leading
Ultimately, a book launch team reads your book prior to launch day, then shares about your book on social media and leaves reviews. The idea is to generate buzz, which then leads to word-of-mouth marketing…climaxing in even more reviews from happy readers.
9. Launch your book
Remember how you set your book deadline way back in step one of this guide to self-publishing for homeschool students? When you know you will complete your book by a specific date, you can then organize your marketing plan to follow this date, which leads to launch day—the day your book enters the world!
The day you launch your book should be one where you push it all over social media, share the reviews you have collected, and of course, celebrate. Learning how to self-publish a book is a massive undertaking that can bring about great rewards.
In fact, this guide to self-publishing for homeschool students could be the launching pad for you to start a small business. At SelfPublishing.com, we help you launch a book to grow your business. Maybe starting a small business could be the next assignment that helps you continue the educational journey to your dreams!
10. Honestly assess your process
This guide to self-publishing for homeschool students would not be complete without analyzing the process. Your final assessment should involve a genuine look at what went well, as well as the various areas for growth.
After launch day comes and goes, sit down for a set period of time and answer the following:
- What did I most enjoy about the process?
- What steps were most difficult?
- Did I meet my sales goals?
- What do I want to repeat that I did well?
- What do I want to change for next time?
Honestly assessing your use of this guide can set you up for even more success down the road.
What is the average cost to self-publish?
While you can self-publish a book for free, your marketing, editing, and design investments can rack up. However, it’s important to note that with self-publishing, your royalty rates can be quite high. According to Forbes, if you choose to self-publish, you receive 20% to 100% of the royalties.
This is a significant difference from traditional publishing royalties, which Forbes states as coming in at just 4-15%. This percentage depends on a myriad of factors, including the details of your contract and your author status.
While the cost to self-publish does lie completely with you, the author-turned-publisher, you keep most of, if not all of, the royalties. There are pros and cons to consider with each publishing process, but if you want complete creative control, self-publishing is the way to go.

Guide to self-publishing for homeschoolers: your next step
Now that you’ve worked through this guide to self-publishing, it’s time to get to work! You can use our free Book Outline Generator to provide you with an outline with just a few clicks. Use this outline as a starting point for your book, make any necessary changes, and then get to writing. It’s time for you to self-publish a book!


Book Outline Generator
Choose your Fiction or Nonfiction book type below to get your free chapter by chapter outline!
Book Outline Generator
Enter your details below and get your pre-formatted outline in your inbox and start writing today!
CONGRATULATIONS
Thanks for submitting! Check your email for your book outline template.
In the meantime, check out our Book Outline Challenge.
